Sming for ESP8266 (Programming for ESP8266: Part 3) настройка Eclipse
Intro
There are multiple frameworks and projects for ESP8266. One of them that stands tall is the Sming Framework . In this article you will learn how to setup the development environment for this framework, how to compile examples and flash them to ESP8266. As in the previous articles we will use Olimex’s ESP8266 dev board.
Sming is my prefered framework for programming ESP8266 for couple of reasons. The most important for me, at least, are:
- Relatively mature
At the moment most of the frameworks for ESP8266 are in heavy development and lack a lot of features. So you may end of with a framework that can help you in the beginning, like the Olimex Arduino Style library, but you will have to implement a lot more yourself for complex application. - Easy to develop with it
The framework is written in C++ and its entry level is not so steep for guys like me that have not programmed in C in the last 15 years, but are good with interpreted languages, like PHP for example. - Has cool features
In Sming update over the air can be done with few lines of code. Try this is in pure C. - Core Features aren’t hidden
If the framework does not have support for what I need I can always try to code it in C or even assembler. NodeMCU has a bit of overhead if one has to do this.
Setup Development Box
In order to use Sming you will need the ESP compiler toolchain plus additional settings. Thanks to the esp8266.dev.box project we can do this without big efforts. The esp8266.dev.box allows us to create isolated development environment. In part 1 and part 2 we explained in details how to setup Virtualbox and Vagrant and how to build our environment. Before reading further make sure that you have read these parts and have set up your virtual box.
Further in this article the physical computer that hosts the virtual machine will be called host. Once you have the virtual box machine configured and running (vagrant up) you can run in a Linux or Mac OS X host console:
PROJECT="sming" vagrant provision
If you have Windows as host you can run the following two commands:
set PROJECT="sming"
vagrant provision
This will get the latest version of the esp-open-sdk, the latest version of Sming and compile the library. If you want to know how this is done in more details then read the contents of <path-to-esp8266.dev.box>/project/sming/provision.sh. The<path-to-esp8266.dev.box>/vm-bootstrap.sh file contains the code needed to setup and compile the toolchain.
Setup Eclipse
You can use a normal text editor to write code but Integrated Development Environments (IDE) make this task much easier. The Sming framework has support for Eclipse CDT. Below you will find instructions how to install and configure Eclipse CDT under Ubuntu. You should be able to do something similar also in other Linux distributions or Operating Systems (OS).
Notice: Eclipse will be run on the host and not in the virtual box. The reason for this is that we do not want to limit the development to a certain IDE.
Under our linux host we can install Eclipse CDT with the following command
sudo apt-get install eclipse-cdt
Start Eclipse after the installation finishes. First thing that needs to be done is to add two C/C++ build variables. In your Eclipse go to Window->Preferences and in the window that will open go to C/C++ -> Build -> Environment. In there you should add two variables:
* SMING_HOME that points to<path-to-esp8266.dev.box>/dev/Sming/Sming
* ESP_HOME that points to<path-to-esp8266.dev.box>/Espressif
See the screenshot below for visual assistance.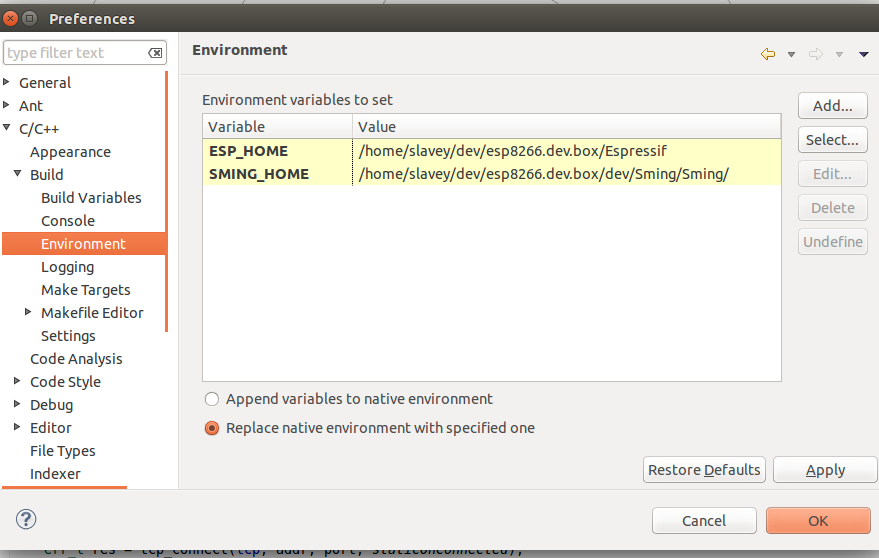
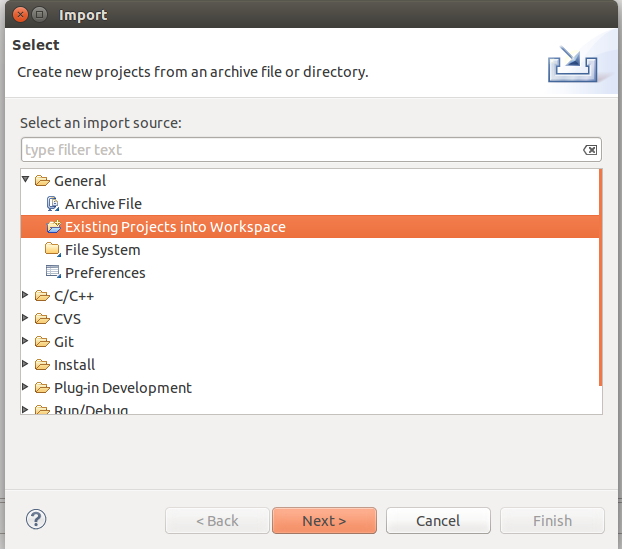
The next step is to import all Sming projects in our workspace. Go to File->Import choose General->Existing Projects in Workspace.
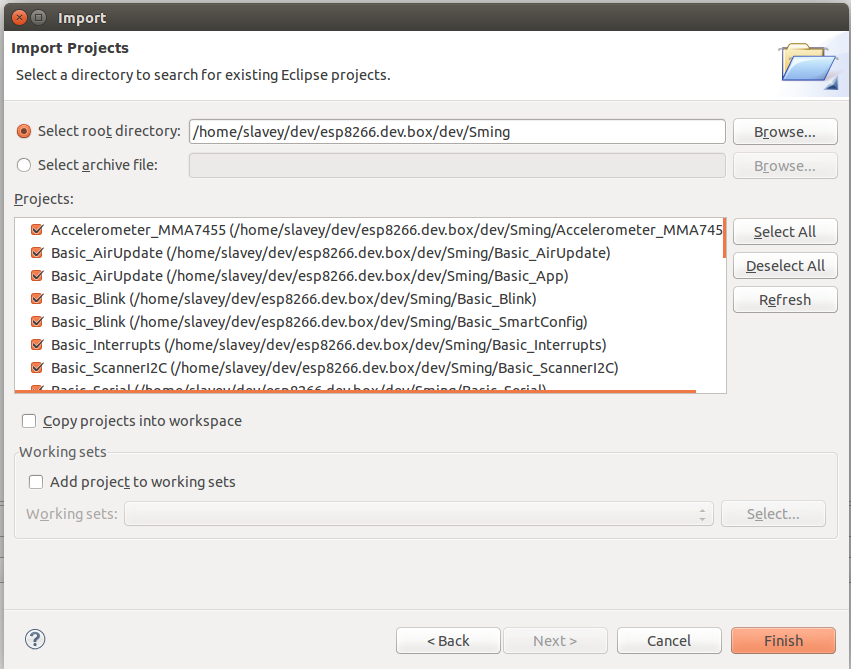
After clicking on “Next” you will have to click on the “Browse” button and choose the folder where the Sming code is located. That should be <path-to-esp8266.dev.box>/dev/Sming. After that click on “Select All” followed by “Finish”. See the screenshot below for assistance.
Now you should have all Sming projects inside of your Eclipse IDE.
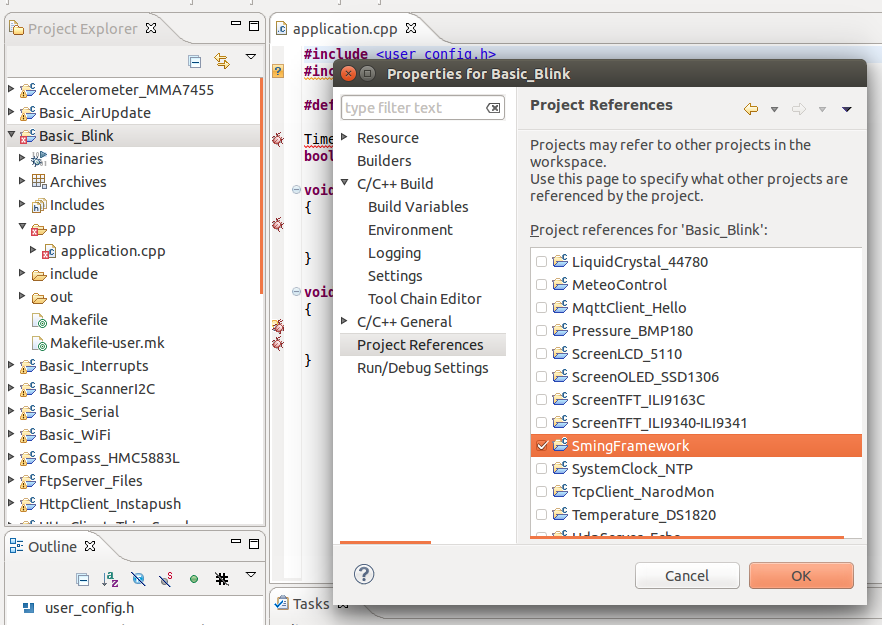
For this article we will try to compile, flash and run the Basic_Blink project. Blinking a led has the status of a “Hello World” program for microcontrollers or embedded devices. To get better code completion and assistance for this project you need to specify that it references the “SmingFramework” project. In the project list on the left right click on the name Basic_Blink. A menu will open. From it choose Properties(this should be the last menu item). A new window will open. In it choose “Project References” and from the list on the right choose “SmingFramework”. See the screenshot for visual assistance.
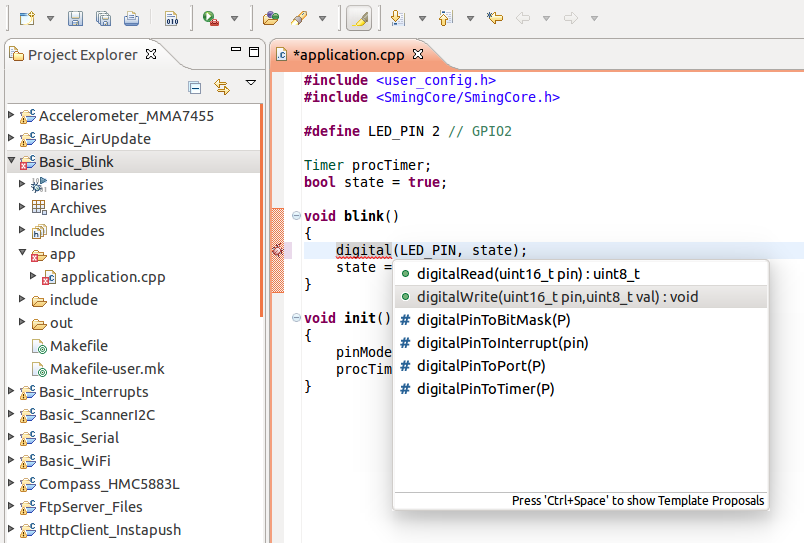
You may need to right click on the project name again and choose Index->Rebuild. After the index is rebuilt you should be able to start coding. By typing the start of a method and pressing CTR+Enter Eclipse should give you suggestions with possible function candidates. As shown below:
That should be it. If you do not see code assistance or a lot of functions that are unrecognized then try to repeat the Eclipse steps.
Compile, Flash and Run
Open Basic_Blink/app/application.cpp. In that file you will see two methods: init and blink. In Sming the “init” method is the one that is called first when the application is started. In it we set the pin mode for the LED pin and start a timer that calls the blink function every 1000 ms.
In the example above the LED_PIN is set to 2. Make sure to adjust that value to match your ESP device. Save the changes and switch to the virtual box console. In it make the following to compile the project:
cd ~/dev/Sming/Basic_Blink
make V=1
Once the compilation is done you can flash the code to the device. I am using Olimex EVB. In order to enter flash mode for this board you have to switch it off, press the button and while holding the button switch it on again. After that try the following commands
sudo su
source /etc/profile.d/esp8266.sh
make flash
For me entering flash mode and flashing works 99% of the time. So if you are lucky it should work also for you. After flashing the code you should see the led blinking.
If you followed the instructions so far you are ready to compile other projects. My personal favourite is Basic_AirUpdate which shows how easy it can be to update the device over the air.
Give it a try and send me your comments.
That’s it for now. We are working on more parts for this series of articles, so stay tuned
Обратная связь
Интересуют вопросы реализации алгоритмов, программирования, выбора электроники и прочая информация, постараюсь осветить в отдельных статьях
пишите мне на netdm@mail.ru

Добавить комментарий